In Php 5.5 or 5.6 Opcache is builtin however Apcu still pain to install on ubuntu 14.04 or centos 6 or 7, if you have Plesk 12 or DirectAdmin INSTALLED.
Survey showed 60% of consumers using WordPress and 45% clients have Performance issue. In most cases PHP performance can slow down the performance of websites. 2 to 3 second delays on loading wordpress site on first click however xcache is the solution for you!
To optimize and accelerate website performance you need to improve the PHP performance cache. there’s so many cache software out there but few of them are easy to install and use on different updated OS like Ubuntu 14.04 or Centos 7, Many opcode cachers such as eAccelerator, APC, Memcached, XCache, etc. Personally, my best experience with XCache on 2015 🙂
Step 1: Installation of XCache for PHP
For Redhat Users can installed xcache from package manager enabling epel repository. Once Enabled use yum command to install it.
RHEL/CentOS/Fedora
# yum install php-xcache xcache-admin
Xcache is installed on Debian by default through package manager.
Debian/Ubuntu/Linux Mint
# apt-get install php5-xcache
Step 2: Configuring of XCache for PHP
We highly recommend you to change few setting in xcache.ini file as per you needs however if you dont want to change still xcache software will work like a charm by default. for more information regarding xcache.ini you can find on xcache website.
RHEL/CentOS/Fedora
# vi /etc/php.d/xcache.ini
Debian/Ubuntu/Linux Mint
# vi /etc/php5/conf.d/xcache.ini

OR

# vi /etc/php5/mods-available/xcache.ini
Step 3: Restarting Apache for XCache
Restart your Dedicated server or Virtual private server once all configuration save and done.
# /etc/init.d/httpd restart
OR
# /etc/init.d/apache2 restart


Use command Without #
Step 4: Verifying XCache for PHP
Type the following command to verify XCache software on your VPS
# php -v
Output after command
PHP 5.5. (cli) (built: Aug  12 2015 16:40:30)
Copyright (c) 1997-2010 The PHP Group
Zend Engine v2.3.0, Copyright (c) 1998-2010 Zend Technologies
    with XCache v3.0.1, Copyright (c) 2005-2013, by mOo
    with XCache Optimizer v3.0.1, Copyright (c) 2005-2013, by mOo
    with XCache Cacher v3.0.1, Copyright (c) 2005-2013, by mOo
    with XCache Coverager v3.0.1, Copyright (c) 2005-2013, by mOo
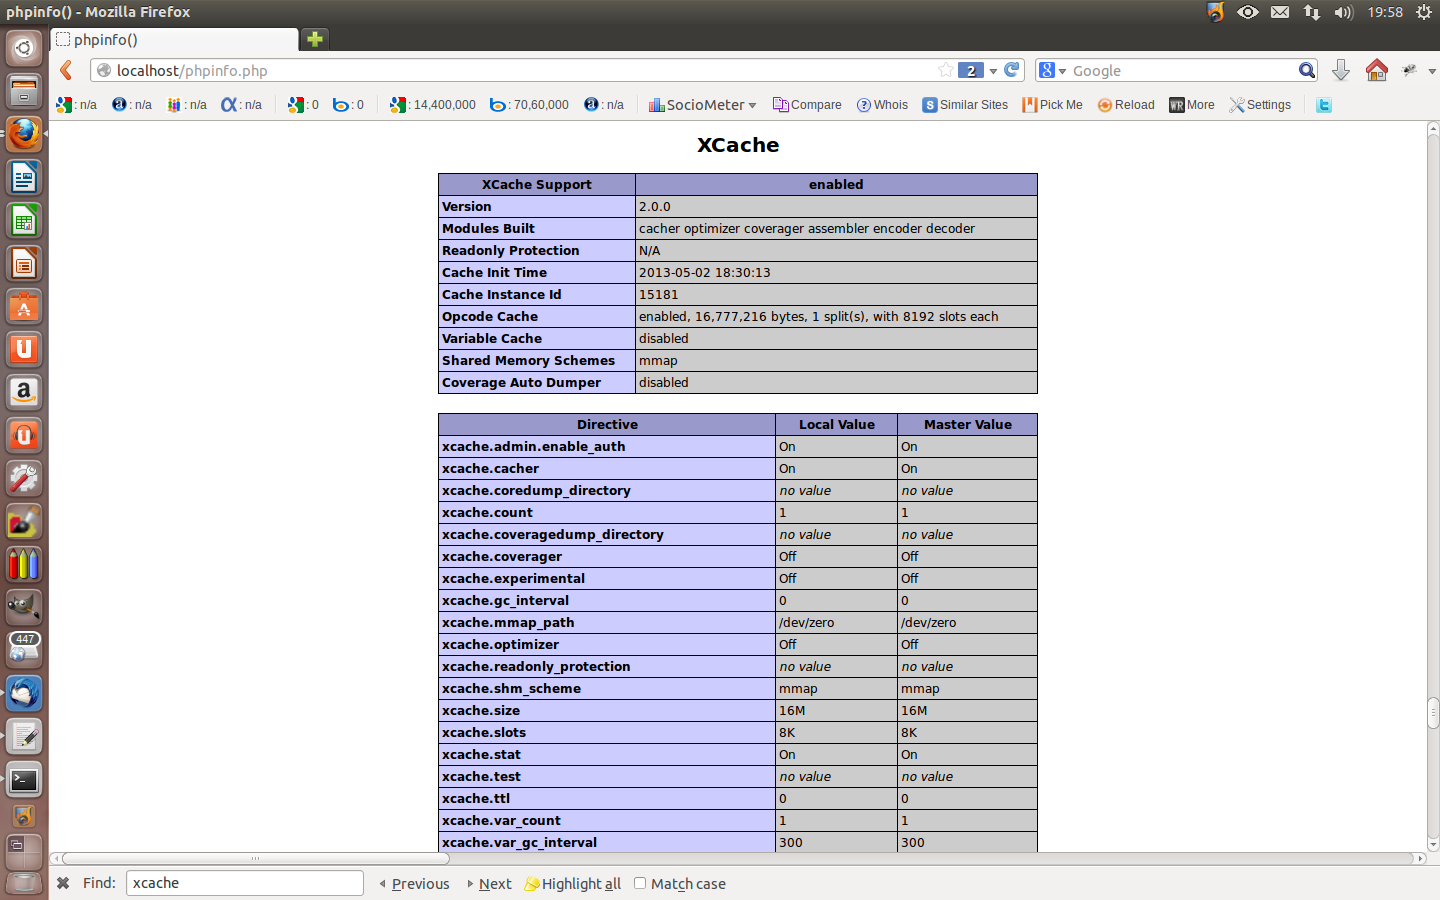
Second option: you can verify XCache by creating a ‘phpinfo.php‘ file under your directory root (i.e. /var/www/html or /var/www).
nano /var/www/phpinfo.php

if showed nano - command not found, use this to install nano:

# sudo apt-get install nano
Save file after add the following php lines
<?php
phpinfo();
?>
Open any web browser and type “http://your-ip-address/phpinfo.php“. You will get below output.
Step 5: Enabling XCache Admin Panel for PHP
To enable admin panel for xcache you have to set a password then add the user and password in the xcache.ini file.
# echo -n "typeyourpassword" | md5sum


Remove the 'typeyoupassword' and add your own password.
Example Output
880493ac136b4e8206f9ada034a4168e
Now find and open Xcache.ini file add the generated md5 password. See the following example, add your own password md5 string.
Path in Ubuntu 14.04: nano /etc/php5/mods-available/xcache.ini OR cd /etc/php5/apache2/conf.d then command: ls
Cntrl – o and Cntrl – X to save and exit file
[xcache-common]
;; non-Windows example:
extension = xcache.so
;; Windows example:
; extension = php_xcache.dll

[xcache.admin]
xcache.admin.enable_auth = On
; Configure this to use admin pages
xcache.admin.user = digitalberg
xcache.admin.pass = digitalber VPS
xcache.admin.pass = "4b3f9d71cfd77171cdce606e11c40fbf"
Now, copy the whole xcache directory to your web site root folder. (i.e. /var/www/html or /var/www).
# cp -a /usr/share/xcache/ /var/www/html/

OR

# cp -a /usr/share/xcache/htdocs /var/www/xcache

OR

cp -a /usr/share/xcache/admin/ /var/www/ (older release)
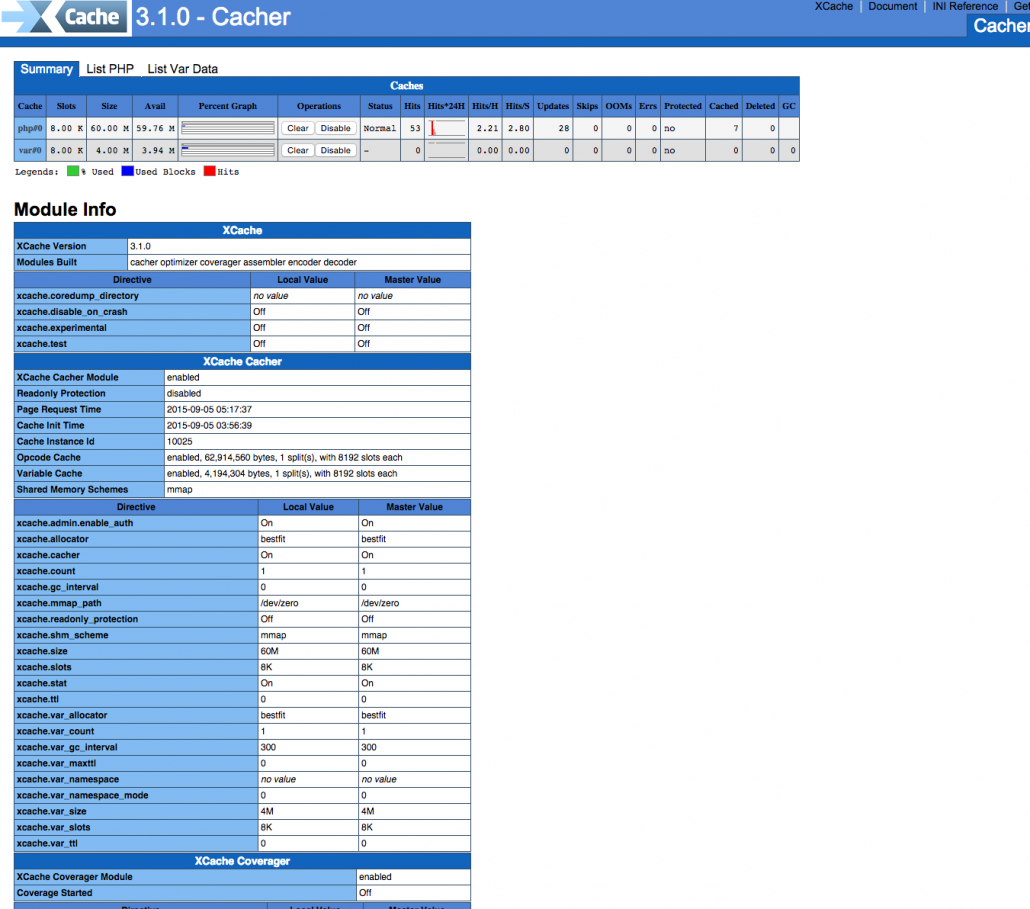
Now type your IP address with with full path : http://xx.xx.xx.xx/xcache/htdocs/cacher or depends on your folder pattern.
Maybe be like this:
http://localhost/xcache – OR – http://localhost/admin (older release).
XCache Homepage for in details


