Posts

How to Configure an Additional IP Address

How to Configure an Additional IP Address

Applies to: AlmaLinux 8 & 9, Rocky Linux 8 & 9

For Digitalberg VPS & Dedicated Server Clients


To configure an additional IP address on your Digitalberg server, follow the steps below carefully. This guide assumes you are using NetworkManager.

Step 1: Identify Your Main Network Interface

Run the following command:

ip a

Note the name of the main network interface. This is usually something like eth0.


Step 2: Create a New Configuration File

Each additional IP requires a separate configuration file in the /etc/sysconfig/network-scripts/ directory.

Use this format for the file name:

ifcfg-NETWORK_INTERFACE:ID

For example, for the first alias on eth0, use:

ifcfg-eth0:0

Create the file using:

sudo nano /etc/sysconfig/network-scripts/ifcfg-eth0:0

Step 3: Add the Configuration

Paste the following lines into the new file, replacing the values with your actual interface and IP:

DEVICE=eth0:0
ONBOOT=yes
BOOTPROTO=none  # Use "static" for CentOS
IPADDR=ADDITIONAL_IP
NETMASK=255.255.255.255
BROADCAST=ADDITIONAL_IP

Save and close the file.


Step 4: Restart the Network Interface

Apply the changes with:

sudo systemctl restart NetworkManager

Troubleshooting

  • If the additional IP doesn’t respond after restarting NetworkManager, try rebooting the server.
  • You can also test the configuration by setting the IP manually:
ifconfig eth0:0 ADDITIONAL_IP netmask 255.255.255.255 broadcast ADDITIONAL_IP up

Then try pinging the IP from an external device.


Still Not Working?

If you’re still facing issues:

  1. Ensure the IP is correctly routed and assigned to your server from the Digitalberg client panel.
  2. Confirm that your firewall or security rules aren’t blocking traffic to the new IP.
  3. If you’re unsure, feel free to open a support ticket via your Digitalberg dashboard and share the following:
  • Your OS name and version
  • Name of the interface used
  • The full content of the new config file

Step-by-Step Guide to Install IonCube Loader on Debian with PHP 8.2 in Virtualmin for WHMCS

Step 1: Update Your System

Before proceeding, ensure your system is up to date. Run the following commands:

sudo apt update && sudo apt upgrade -y

Step 2: Download the Latest IonCube Loader

Download the latest version of IonCube for Linux (64-bit):

cd /usr/local/src
wget https://downloads.ioncube.com/loader_downloads/ioncube_loaders_lin_x86-64.tar.gz

Extract the archive:

tar -xvzf ioncube_loaders_lin_x86-64.tar.gz

Step 3: Find the PHP Extension Directory

Determine the PHP extension directory by running:

php -i | grep extension_dir

This will return a path, such as:

extension_dir => /usr/lib/php/20220829

Make a note of this path.

Step 4: Move IonCube Loader to PHP Extensions Directory

Move the appropriate IonCube loader file to the PHP extension directory:

sudo cp ioncube/ioncube_loader_lin_8.2.so /usr/lib/php/20220829/

Step 5: Find the Correct PHP INI File

To locate the active php.ini file, use:

php -i | grep "Loaded Configuration File"

You should see an output like:

Loaded Configuration File => /etc/php/8.2/apache2/php.ini

Make a note of this path.

To find the php.ini file used by the PHP CLI, run:

php -i | grep 'php.ini'

Example output:

Configuration File (php.ini) Path => /etc/php/8.2/cli
Loaded Configuration File => /etc/php/8.2/cli/php.ini

This confirms the exact php.ini file used by the CLI.

Step 6: Edit PHP.ini to Enable IonCube

Open the php.ini file in a text editor:

sudo nano /etc/php/8.2/apache2/php.ini

Add the following line at the very top:

zend_extension = "/usr/lib/php/20220829/ioncube_loader_lin_8.2.so"

Save and exit (Press CTRL + X, then Y, then Enter).

Do the same for the CLI php.ini:

sudo nano /etc/php/8.2/cli/php.ini

Add the same zend_extension line at the top.

Step 7: Restart Apache and PHP-FPM

Restart the webserver and PHP service for changes to take effect:

sudo systemctl restart apache2
sudo systemctl restart php8.2-fpm

Step 8: Verify IonCube Installation

To confirm IonCube is installed correctly, run:

php -v

If installed correctly, you should see something like:

PHP 8.2.10 (cli) (built: Sep 7 2023 08:42:18) (NTS)
with the ionCube PHP Loader (enabled) + Intrusion Protection from ioncube.com

Step 9: Enable IonCube for Virtualmin

If you are running Virtualmin with multiple PHP versions, ensure the loader is enabled for all versions. Edit the respective php.ini file inside:

/etc/php/8.2/fpm/php.ini
/etc/php/8.2/cli/php.ini
/etc/php/8.2/apache2/php.ini

Add the same zend_extension line and restart PHP and the web server.

Step 10: Test WHMCS Compatibility

Once IonCube is installed, navigate to WHMCS admin → System Health Status to confirm that IonCube is detected and running properly.

You have now successfully installed IonCube Loader for PHP 8.2 in Virtualmin for WHMCS! 🚀

How CloudFlare increases speed and security of your site

CloudFlare, a web performance and security company, is excited to announce our partnership with DIGITALBERG! If you haven’t heard about CloudFlare before, our value proposition is simple: CloudFlare will make any website twice as fast and protect it from a broad range of web threats.

Cloudflare power more than 400 billion monthly page views – more than Amazon, Wikipedia, Twitter, Zynga, AOL, Apple, Bing, eBay, PayPal and Instagram combined – and over 1.2 billion monthly users regularly pass through our network. We’re really glad DigitalBerg has partnered with CloudFlare.

Faster web performance

CloudFlare is designed to take a great hosting platform like DigitalBerg and make it even better.

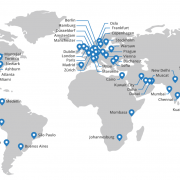
Cloudflare run data centers strategically located around the world. When you sign up for CloudFlare,CloudFlare begin routing your traffic to the nearest data center.

As your traffic passes through the data centers, CloudFlare intelligently determine what parts of your website are static versus dynamic. The static portions are cached on their servers for a short period of time, typically less than 2 hours before CloudFlare check to see if they’ve been updated. By automatically moving the static parts of your site closer to your visitors, the overall performance of your site improves significantly.

CloudFlare’s intelligent caching system also means you save bandwidth, which means saving money, and decreases the load on your servers, which means your web application will run faster and more efficiently than ever. On average, CloudFlare customers see a 60% decrease in bandwidth usage, and a 65% in total requests to their servers. The overall effect is that CloudFlare will typically cut the load time for pages on your site by 50% which means higher engagement and happier visitors.

Broad web security

Over the course of 2011, CloudFlare identified a 700% increase in the number of distributed denial of service attacks (DDoS),CloudFlare track on the Internet (see the chart below). As attacks like these increase, CloudFlare is stepping up to protect sites.

CloudFlare’s security protections offer a broad range of protections against attacks such as DDoS, hacking or spam submitted to a blog or comment form. What is powerful about CloudFlare approach is that the system gets smarter the more sites that are part of the CloudFlare community. CloudFlare analyze the traffic patterns of hundreds of millions of visitors in real time and adapt the security systems to ensure good traffic gets through and bad traffic is stopped.

In time, our goal is nothing short of making attacks against websites a relic of history. And, given our scale and the billions of different attacks CloudFlare see and adapt to every year, CloudFlare well on our way to achieving that for sites on the CloudFlare network.

Signing up

Any website can deploy CloudFlare, regardless of your underlying platform. By integrating closely with DigitalBerg, CloudFlare make the process of setting up CloudFlare “1 click easy” through your existing DigitalBerg dashboard. Just look for the CloudFlare icon, choose the domain you want to enable, and click the orange cloud. That’s it!

We’ve kept the price as low as possible and plans offered through DigitalBerg are free. Moreover, CloudFlare never charge you for bandwidth or storage, therefore saving you tons via reduced bandwidth costs.

For site owners who would like to take advantage of CloudFlare’s advanced offerings, CloudFlare also offer a ‘Pro’ tier of service for $20/month. The ‘Pro’ tier includes all of the ‘Free’ tier’s offerings, as well as extra features like SSL, full web application firewall and faster analytics.

We’re proud that every day more than a thousand new sites, including some of the largest on the web, join the CloudFlare community. If you’re looking for a faster, safer website, you’ve got a good start with DigitalBerg, but the next step is to join the CloudFlare community.

Future of Web Hosting – DigitalBerg Upgrades

It’s that time of the decade again! It’s time for everyone to panic, freak out and throw their hands up hopelessly. So DigitalBerg has decided for some awesome updated for the customers. These upgrades includes

  1. Backup as a Service (BaaS)

This unique Data backup service or BaaS is an easy solution for a remote and safe data storage in Digital Berg cloud, which is deployed in large data centers in London, Frankfurt, Amsterdam and Riga.

Read more

Portfolio Items