
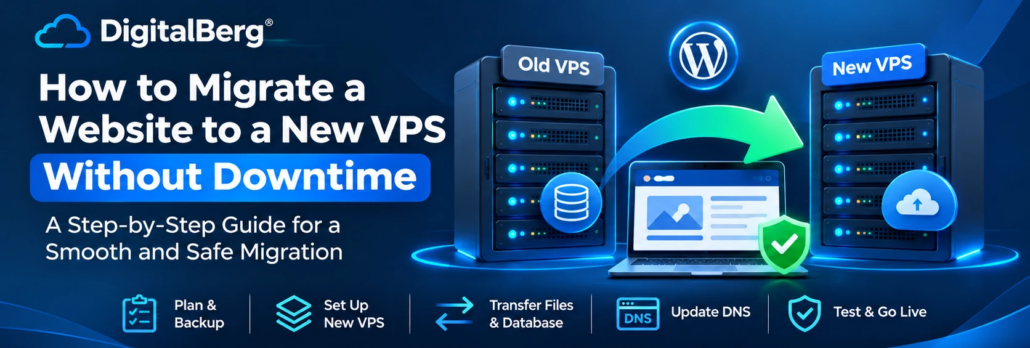
How to Migrate a Website to a New VPS Without Downtime
Moving a website to a new server can feel risky, especially when customers depend on it every day. You might worry about broken pages, missing orders, lost emails or visitors seeing an error during the move.
Fortunately, a well-planned VPS migration can keep disruption to a minimum.
The key is to prepare the new server while your existing website stays online. You can then test the new environment, transfer the latest data and switch traffic when everything is ready.
This guide explains how to migrate website to a new VPS, from the first backup to the final checks. It also covers common mistakes and the extra precautions needed for WordPress and e-commerce websites.
Can You Migrate a Website to a New VPS Without Downtime?
Yes, it is possible to migrate some websites without noticeable downtime. However, the result depends on your website’s architecture and how frequently its data changes.
For a simple website with mostly static content, the process can be relatively straightforward. You copy the files, configure the new server, test the website and update the DNS records.
A busy online store is more complicated. Customers may place orders, create accounts or update information while the migration is taking place.
If the old and new servers accept changes independently, some information could be lost or become inconsistent.
For these websites, you may need database replication, shared storage, a carefully controlled final synchronisation or a short maintenance window.
The aim should be to keep the website available while protecting data integrity. A brief planned interruption is often better than an apparently seamless migration that loses customer information.
Why Move Your Website to a New VPS?
There are several reasons to change servers.
Your current VPS may be running out of resources. Perhaps your website receives more traffic than it did a year ago, or your application needs newer software.
Other common reasons include:
- Moving to a server with more RAM or CPU capacity
- Improving storage performance
- Changing data centre locations
- Upgrading an outdated operating system
- Moving from shared hosting to a VPS
- Improving control over server configuration
- Consolidating multiple websites
- Changing hosting providers
Whatever the reason, the migration should be treated as a technical project rather than a simple file transfer.
A new server may offer better resources, but those resources will only help if the website and its services are configured correctly.
If you are still choosing an environment, compare the resources and management requirements of different VPS hosting options from DigitalBerg.
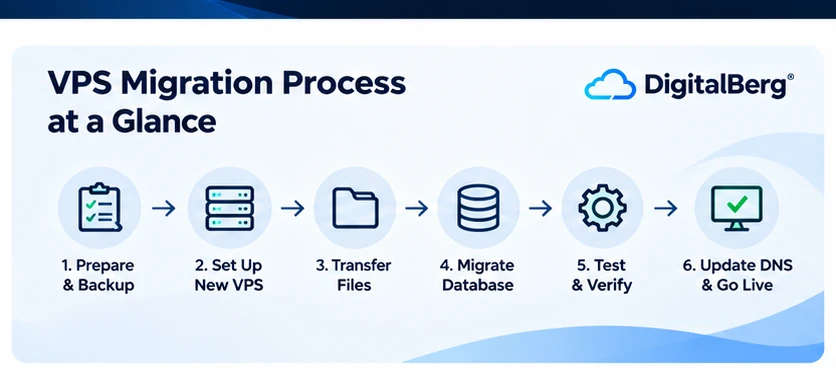
Step 1: Audit Your Existing Website and Server
Before transferring anything, document what is currently running.
Many migration problems happen because an important service was overlooked.
For example, the website files might transfer successfully, but a scheduled task stops running. Alternatively, the website loads correctly while its contact forms fail to send emails.
Start by recording the following details.
Website and Application Information
Identify your content management system or application framework.
Record the versions of PHP, Python, Node.js or other software your website requires.
Also check which database system is installed, such as MySQL, MariaDB or PostgreSQL.
Server Configuration
Make a note of your current web server, which might be Nginx, Apache or another platform.
Review the configuration files, document roots, redirects, SSL certificates and application permissions.
Background Services
Check for scheduled tasks, queue workers, caching services and other background processes.
These may not be visible when you open the homepage, but they can be essential to your application.
Email and DNS
Identify where your email is hosted.
Check your domain’s DNS records, including A, AAAA, MX, TXT and CNAME records.
Do not assume that moving the website also means moving email services.
A complete inventory gives you a clear picture of what must work on the new VPS.
Step 2: Create a Complete Backup Before Migration
Never begin a production migration without a reliable backup.
A backup provides a recovery option if something goes wrong during the transfer.
At minimum, protect your website files, databases and important configuration information.
For websites that manage customer information, consider how to preserve uploaded files, transaction records and other changing data.
What Should You Back Up?
Your backup should cover the components required to restore the application.
These commonly include:
- Website files and media
- Database contents
- Application configuration
- Web server configuration
- SSL-related configuration and certificate material
- Scheduled task definitions
- Relevant email data, if email is being migrated
Keep the backup in a secure location outside the original VPS.
A snapshot can also be useful, but it should not automatically replace an independent backup.
Most importantly, verify that the backup can be restored.
An archive that exists but cannot be recovered offers little protection.
Step 3: Prepare the New VPS
Your destination server should be ready before you begin the final migration.
Install a supported operating system and the software required by your application.
For example, a typical WordPress website might require:
- A Linux operating system
- Nginx or Apache
- A supported PHP version and necessary extensions
- MySQL or MariaDB
- Appropriate firewall rules
- SSL/TLS configuration
Avoid copying old configuration files without reviewing them. Settings that worked on the previous server may not suit the new operating system or software versions.
Secure the Server First
Before exposing the new VPS to public traffic, configure its security.
Use SSH keys where practical, restrict administrative access and install security updates.
Enable only the network ports your services require.
You should also configure monitoring and make sure the server’s clock is synchronised correctly.
If you are setting up a Linux server for the first time, DigitalBerg’s Ubuntu VPS setup guide explains the main configuration steps.
Step 4: Lower Your DNS TTL Before the Move
DNS connects your domain name to the server that hosts your website.
When you change the server’s IP address, DNS records need to be updated.
However, DNS responses can remain cached by resolvers and devices.
That is where the Time to Live, or TTL, setting matters.
TTL tells DNS resolvers how long a response may be cached.
For example, a TTL of 3,600 seconds represents one hour.
Before your migration, you can reduce the TTL on the records you plan to change, provided your DNS provider allows it.
A value such as 300 seconds is often used for planned migrations.
Make this change sufficiently early for previously cached responses to expire.
Important: A lower TTL does not guarantee that every visitor will immediately reach the new server. Some caches may retain older information longer than expected.
That is why you should keep the original server running during the transition.
Step 5: Transfer Website Files to the New VPS
Once the destination is ready, transfer the website files.
You can use a hosting control panel, SFTP or a command-line utility.
For Linux-to-Linux migrations, rsync is a common choice because it can transfer files efficiently and repeat the process to copy later changes.
For example:
rsync -avz /var/www/example/ user@NEW_SERVER:/var/www/example/Replace the example paths, username and server address with your actual values.
This command is illustrative. The destination directory, permissions and SSH access must already be configured.
Do not blindly copy ownership or permission settings from one environment to another.
Also remember that files may change while the website remains active.
A second synchronisation may be necessary shortly before the final switch.
For applications that accept uploads, coordinate the final file transfer with the database cutover so that both remain consistent.
Step 6: Migrate Your Database Safely
Database migration is often the most sensitive part of the process.
A website can continue generating new records while the initial database transfer takes place.
For a relatively small MySQL website, an administrator might use a consistent database export.
An illustrative command is:
mysqldump --single-transaction --routines --triggers --events -u DB_USER -p DB_NAME > database.sqlThe --single-transaction option can provide a consistent snapshot for transactional tables such as InnoDB under suitable conditions. It does not guarantee consistency for every storage engine or concurrent schema change.
Importing into the destination may use:
mysql -u DB_USER -p DB_NAME < database.sqlThese commands require suitable permissions, compatible database versions and a correctly prepared destination.
For large or high-traffic databases, a simple export and import may not be the best approach.
Preventing Data Loss During the Switch
Consider what happens if a customer places an order after you export the database.
That order exists on the old server but may not appear on the new one.
To avoid this, choose a strategy suited to your application.
For a low-traffic website, you may be able to pause changes briefly, perform a final database transfer and then switch traffic.
For a busy application, replication or a more advanced migration process may be appropriate.
Database replication requires careful configuration, compatibility checks and validation. It should not be introduced for the first time during a critical production cutover.
The correct approach depends on how your application handles writes, sessions and background jobs.
Step 7: Test Your Website Before Changing DNS
One of the most important migration rules is simple: test first, switch later.
You should be able to access the website on the new server without sending all visitors there.
One option is to use a temporary hostname.
Another is to configure a local hosts-file override on your computer so your domain resolves to the new VPS during testing.
This allows you to inspect the new environment while public visitors continue using the original server.
What Should You Test?
Do not stop after checking the homepage.
Test important features, including:
- Navigation and internal links
- Images and downloadable files
- Login and logout
- Contact forms
- Search functionality
- Database connections
- Redirects
- Scheduled tasks
- API integrations
- Mobile responsiveness
- HTTPS and certificate behaviour
For an online store, also test the cart, checkout, payment gateway sandbox, account pages and order notifications.
Check the server logs for errors.
A page that looks correct in a browser may still have broken background functionality.
Step 8: Prepare SSL Before the DNS Switch
Your website should continue using HTTPS after the migration.
Before switching traffic, confirm that the destination server has a valid certificate for the domain.
Depending on your certificate provider and validation method, you may be able to issue or install the certificate before changing public DNS.
For example, DNS-based domain validation can allow certificate issuance without directing live website traffic to the new server.
If you use HTTP-based validation, make sure the validation request can reach the correct environment.
Also confirm that your HTTPS redirects and application URLs are configured properly.
Do not disable HTTPS temporarily just to complete the migration.
Step 9: Switch Traffic to the New VPS
Once the new environment has passed testing and the latest data has been synchronised, you can begin the cutover.
For a straightforward migration, this usually means updating the relevant A or AAAA records to point to the new server.
For more complex applications, a load balancer or reverse proxy may be used to control the transition.
Before making the change, confirm that:
- The destination is healthy.
- The latest required data is present.
- Any write freeze or replication process is ready.
- SSL works correctly.
- Monitoring is active.
- A rollback procedure is documented.
Update the DNS records and monitor traffic.
Some visitors may continue reaching the original server while cached DNS responses expire.
For websites with changing data, make sure the old environment cannot accept independent writes that would later be lost.
This may require read-only operation, controlled routing or another application-specific cutover method.
Step 10: Monitor the Website After Migration
A successful DNS change does not mean the migration is finished.
Continue checking the website from different networks and locations.
Monitor server health and application behaviour.
Important metrics include:
- HTTP error rates
- Response times
- CPU and memory usage
- Disk activity
- Database connection errors
- Application logs
- Checkout or form completion
- Background job processing
Compare the results with your previous environment.
A new VPS may require additional tuning after real traffic begins reaching it.
For example, PHP worker limits, caching settings or database memory allocation may need adjustment.
Make changes based on actual measurements rather than assumptions.
Step 11: Keep the Old VPS Available Temporarily
Do not immediately cancel your previous hosting service.
Keep it available until you have confirmed that the migration is complete and the required data is consistent.
The appropriate overlap period depends on your DNS configuration, application behaviour and operational requirements.
During this time, review logs on both servers.
Check whether visitors are still reaching the old IP address.
Also verify that email delivery, scheduled tasks and third-party integrations work correctly.
When you are satisfied that the old environment is no longer needed, take a final backup and decommission it securely.
Remove unnecessary credentials and revoke access that should no longer exist.
Common VPS Migration Mistakes to Avoid
Even experienced administrators can overlook small details.
Changing DNS Before Testing
Switching traffic too early can expose visitors to broken pages or missing application features.
Test the destination first.
Forgetting Email Records
Changing nameservers or replacing a DNS zone without preserving MX, SPF, DKIM and other records can disrupt email.
Review the entire DNS configuration before making changes.
Using an Outdated Database Copy
An old database export may omit recent orders, customer accounts or content updates.
Plan the final synchronisation carefully.
Ignoring Background Jobs
Scheduled tasks and queue workers may continue running on both servers after the migration.
This can lead to duplicate emails, repeated jobs or conflicting updates.
Make sure these services are enabled only where appropriate.
Cancelling the Old VPS Too Soon
DNS caches and external integrations may continue pointing to the old server.
Keep the source available until you have verified the cutover.
Failing to Prepare a Rollback Plan
A rollback should be more than changing DNS back to the old IP address.
If the new server has already accepted orders or other writes, returning traffic to the old database may lose that information.
Your recovery plan must account for data created after the cutover.
Special Considerations for WordPress and WooCommerce
WordPress websites are often straightforward to migrate, but several details deserve attention.
Check the PHP version, extensions, file permissions and database compatibility.
Review the site’s configured URLs and any caching plugins.
If the domain is staying the same, you should not normally need to change every URL in the database.
If the domain is changing, use a WordPress-aware search-and-replace tool that safely handles serialised data.
For WooCommerce, take extra care with orders, stock levels, customer accounts and payment callbacks.
A basic database copy may not be sufficient for a busy store.
Coordinate the final transfer to prevent transactions from being written to different servers.
Also review scheduled actions, payment webhooks and transactional emails after the move.
VPS Migration Checklist
Use this checklist before switching your live website:
-
Record the existing server and application configuration.
-
Create verified off-server backups.
-
Prepare and secure the destination VPS.
-
Check software compatibility.
-
Lower DNS TTL in advance.
-
Transfer website files.
-
Migrate and validate the database.
-
Prepare SSL certificates.
-
Test the website on the destination.
-
Plan the final data synchronisation.
-
Prepare a rollback procedure.
-
Update DNS or switch traffic.
-
Monitor the new environment.
-
Keep the old server available until validation is complete.
Frequently Asked Questions
How long does it take to migrate a website to a VPS?
The time depends on website size, database complexity, transfer speed and testing requirements. A simple website may take a few hours, while a large application may require several days of preparation and validation.
Will changing VPS hosting affect my SEO rankings?
Changing servers does not automatically reduce rankings. However, prolonged downtime, broken redirects, server errors or inaccessible pages can affect search performance. Keep URLs consistent and monitor the website after migration.
Can I migrate WordPress without putting it into maintenance mode?
Sometimes. A mostly static WordPress website can often be transferred with little disruption. Websites with frequent comments, orders, uploads or account changes need additional measures to prevent data loss.
Do I need to change my domain name when moving to a VPS?
No. You can keep the same domain name and update its DNS records to point to the new server.
Does DNS propagation always take 24 to 48 hours?
No. Many changes become visible much sooner, depending on TTL values and caching behaviour. However, some resolvers or devices may continue using older records longer than expected.
Can I migrate a website myself?
Yes, if you have the necessary server administration skills. For complex applications or websites handling important transactions, professional assistance may reduce operational risk.
Should I delete the old VPS after the DNS update?
Not immediately. Keep it available until you have confirmed that traffic, data, email and application services are functioning correctly on the new environment.
Final Thoughts
Migrating a website to a new VPS does not have to mean taking it offline for hours.
With proper planning, you can prepare the destination server, transfer most of the data and test everything while the original website continues running.
The most important part is managing the final transition safely.
Protect your data, understand how your application handles changes and monitor both environments throughout the process.
For website owners planning a move, choosing a VPS with suitable resources and administrative access is an important starting point.
Explore DigitalBerg VPS hosting to compare available server options. If you need assistance with migration planning or server administration, confirm the available support arrangements with the DigitalBerg team before starting.
A successful migration is not simply about moving files. It is about keeping your website reliable, secure and ready for visitors on its new server.




Leave a Reply
Want to join the discussion?Feel free to contribute!